GitHub
Cartographer integrates with GitHub to scan your repositories for generating and updating documentation, or to create pull requests that create/update README files or other documents.
Connecting to GitHub
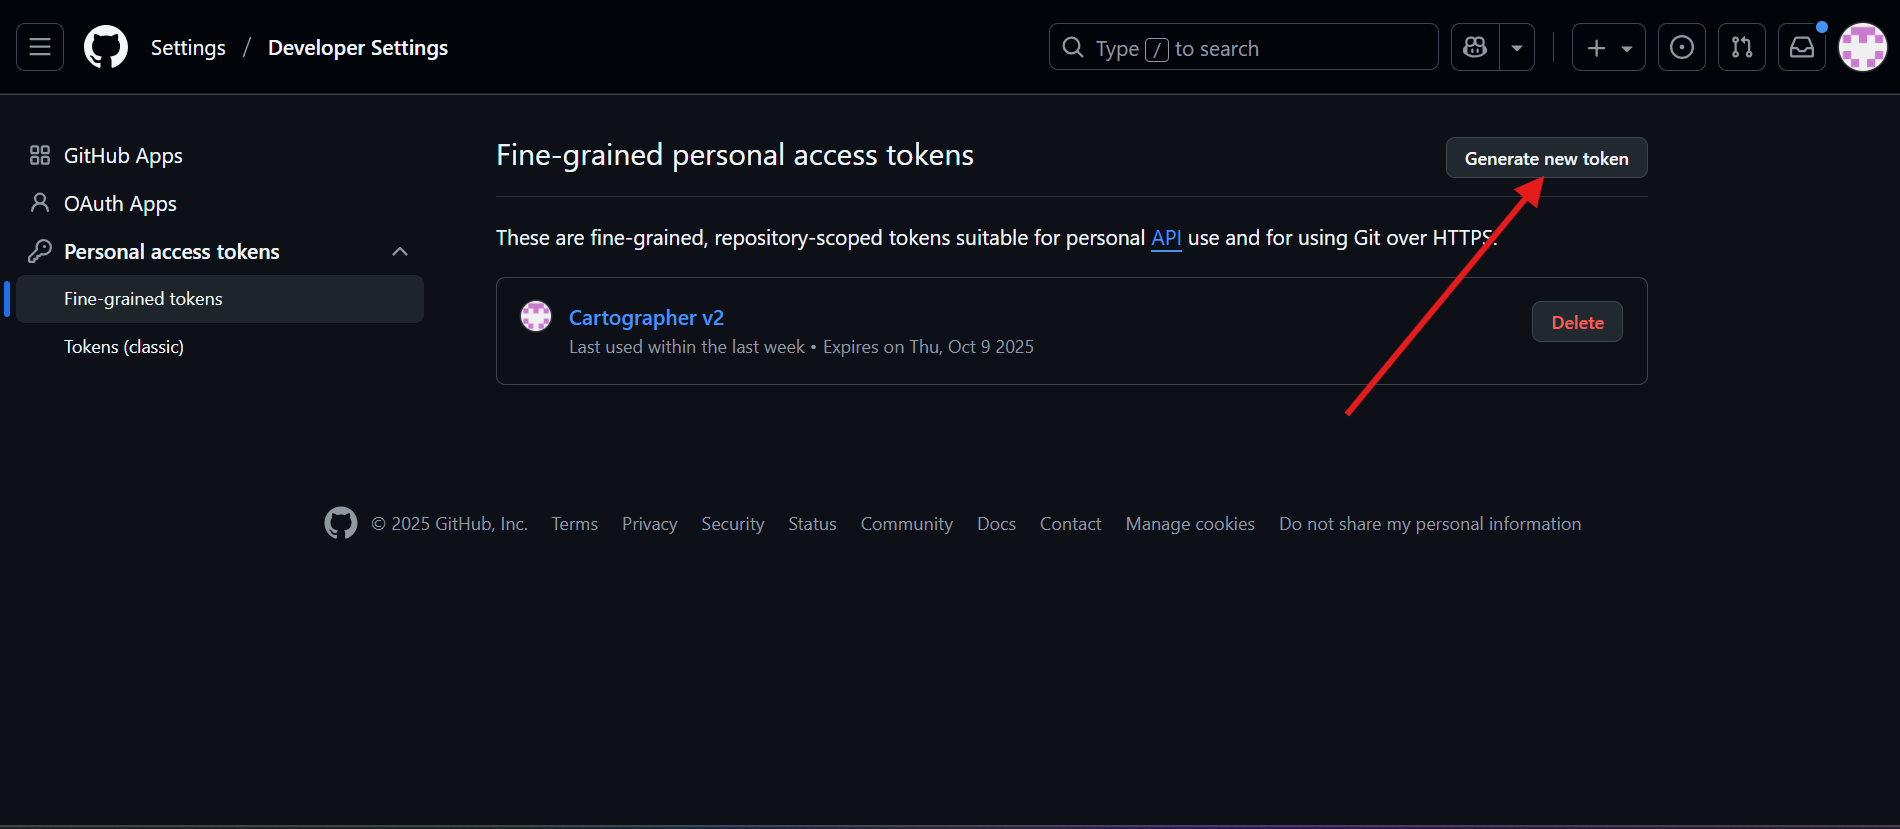
- GitHub relies on access tokens to pass access your instance. Navigate to this link to generate a fine grained access token.
- Click the Generate new token button
- We recommend granting the token access only to the repositories you want Cartographer to use. To do this, scroll to the Repository access section and select the Only select repositories option. Then, click the Select repositories button to display a list of available repositories and choose the ones you want to grant access to.
-
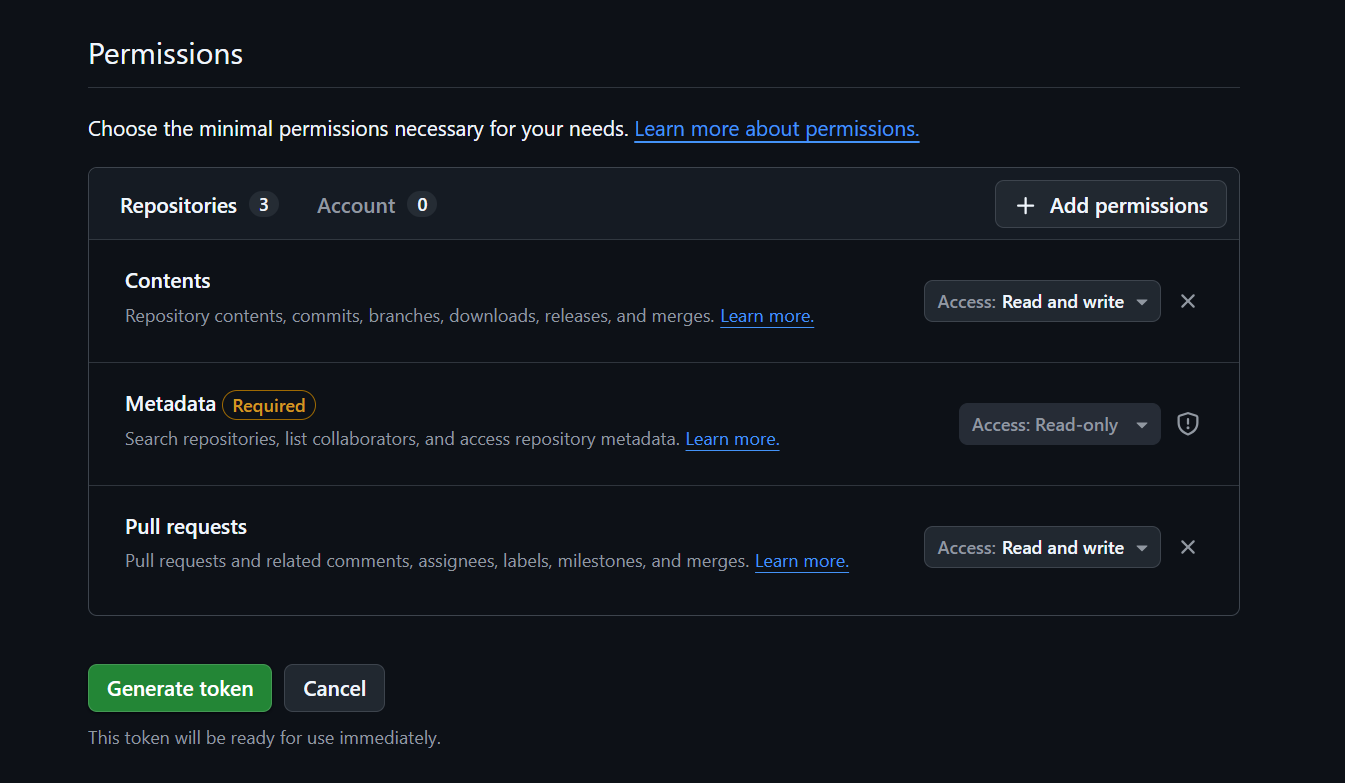
Scroll down to the Permissions section and
configure the following:
- For the Repository Scan feature, enable the Contents permission and set it to Read and write.
- For updating README files or other documents, enable the Pull Requests permission and set it to Read and write.
- To use both features, enable both permissions.
- Click Generate token and then save it for future use.
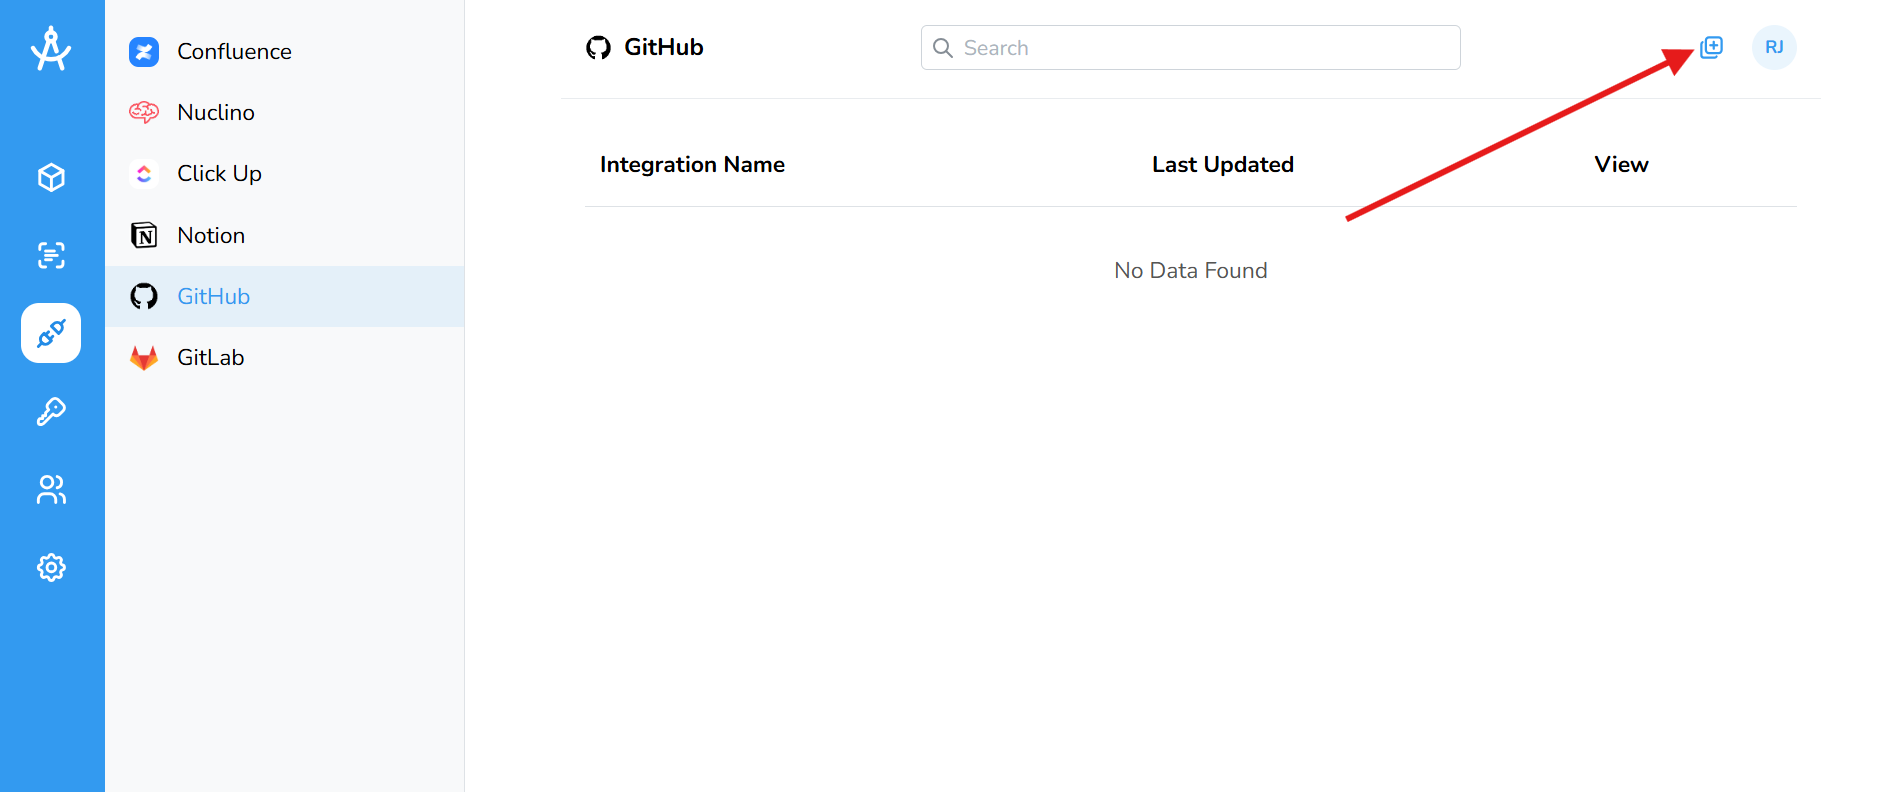
- Navigate back to Cartographer. In the left-hand menu, click the Integrations navigation button.
- In the top-right toolbar, click the Add GitHub Integration icon.
-
You’ll be directed to a form with four fields:
Name, Owner Name,
Repository Name, and API Key.
- Name: A custom label of your choice.
- Owner Name: The GitHub username of the repository owner.
- Repository Name: The exact name of the repository in GitHub.
- API Key: The previously generated key from GitHub.
- After filling out the form, paste your API key into the field and click Save. Note: If the API key is invalid, the integration cannot be saved.
- Once connected, the integration will appear in your table. You can edit or delete it at any time by clicking the chevron icon.
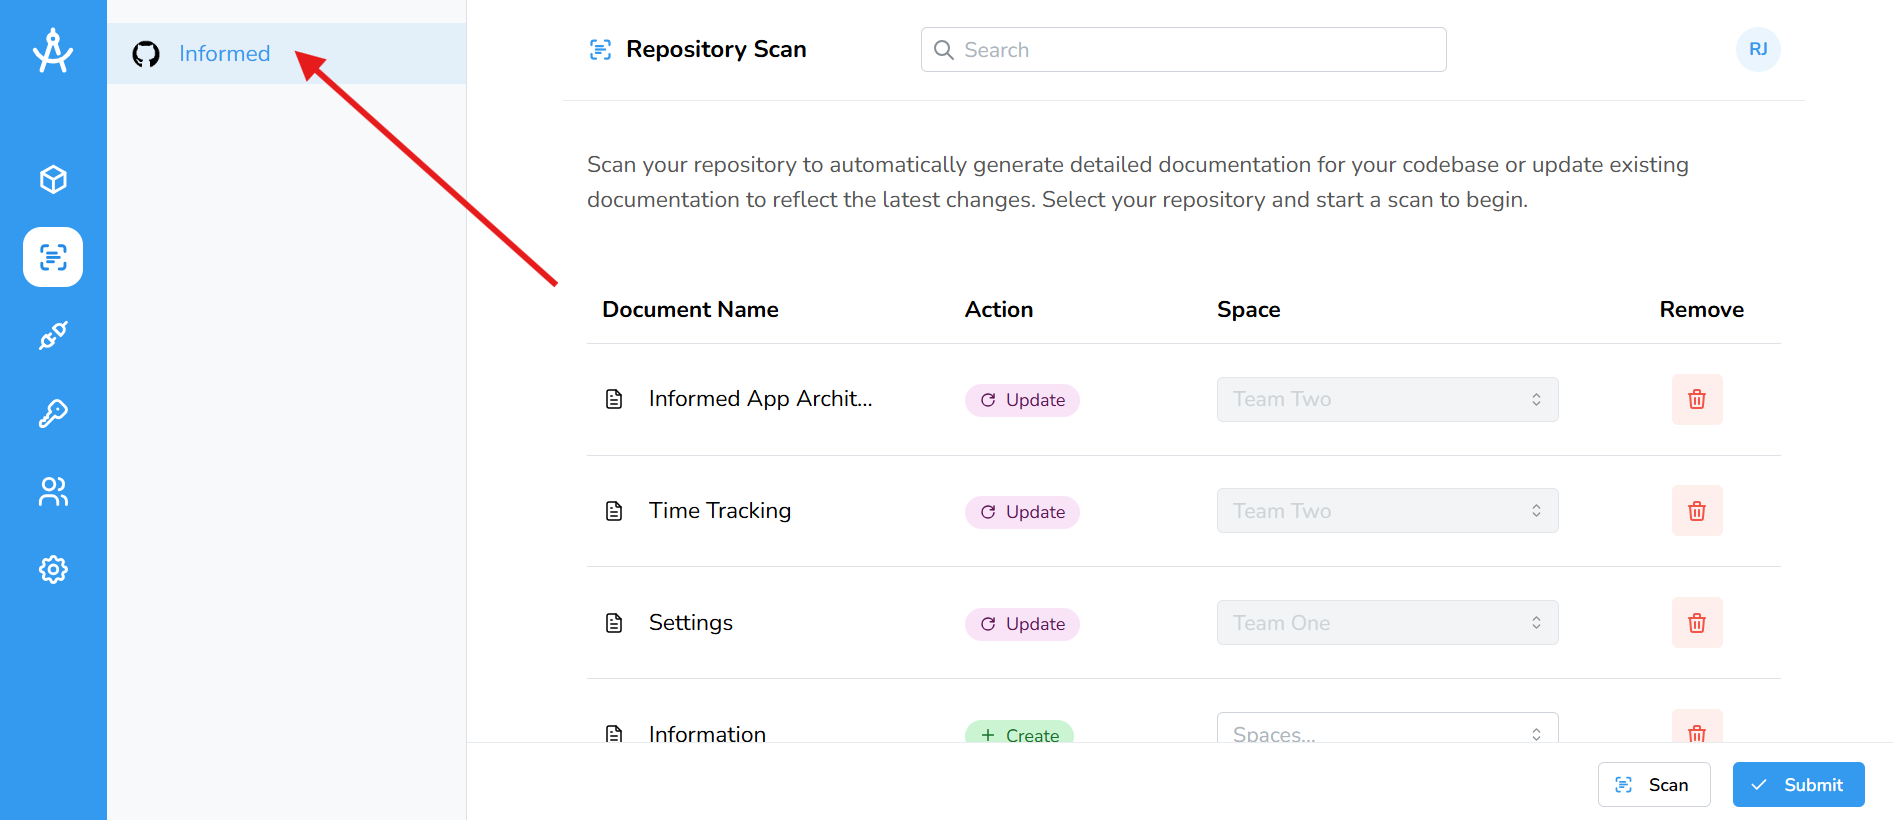
Repository Scan
Now that your GitHub integration is set up, you can access the Repository Sync from the left-hand navigation bar. Your connected repository will appear in the list, where you can scan it and continue using the sync feature.
Syncing your documents to GitHub
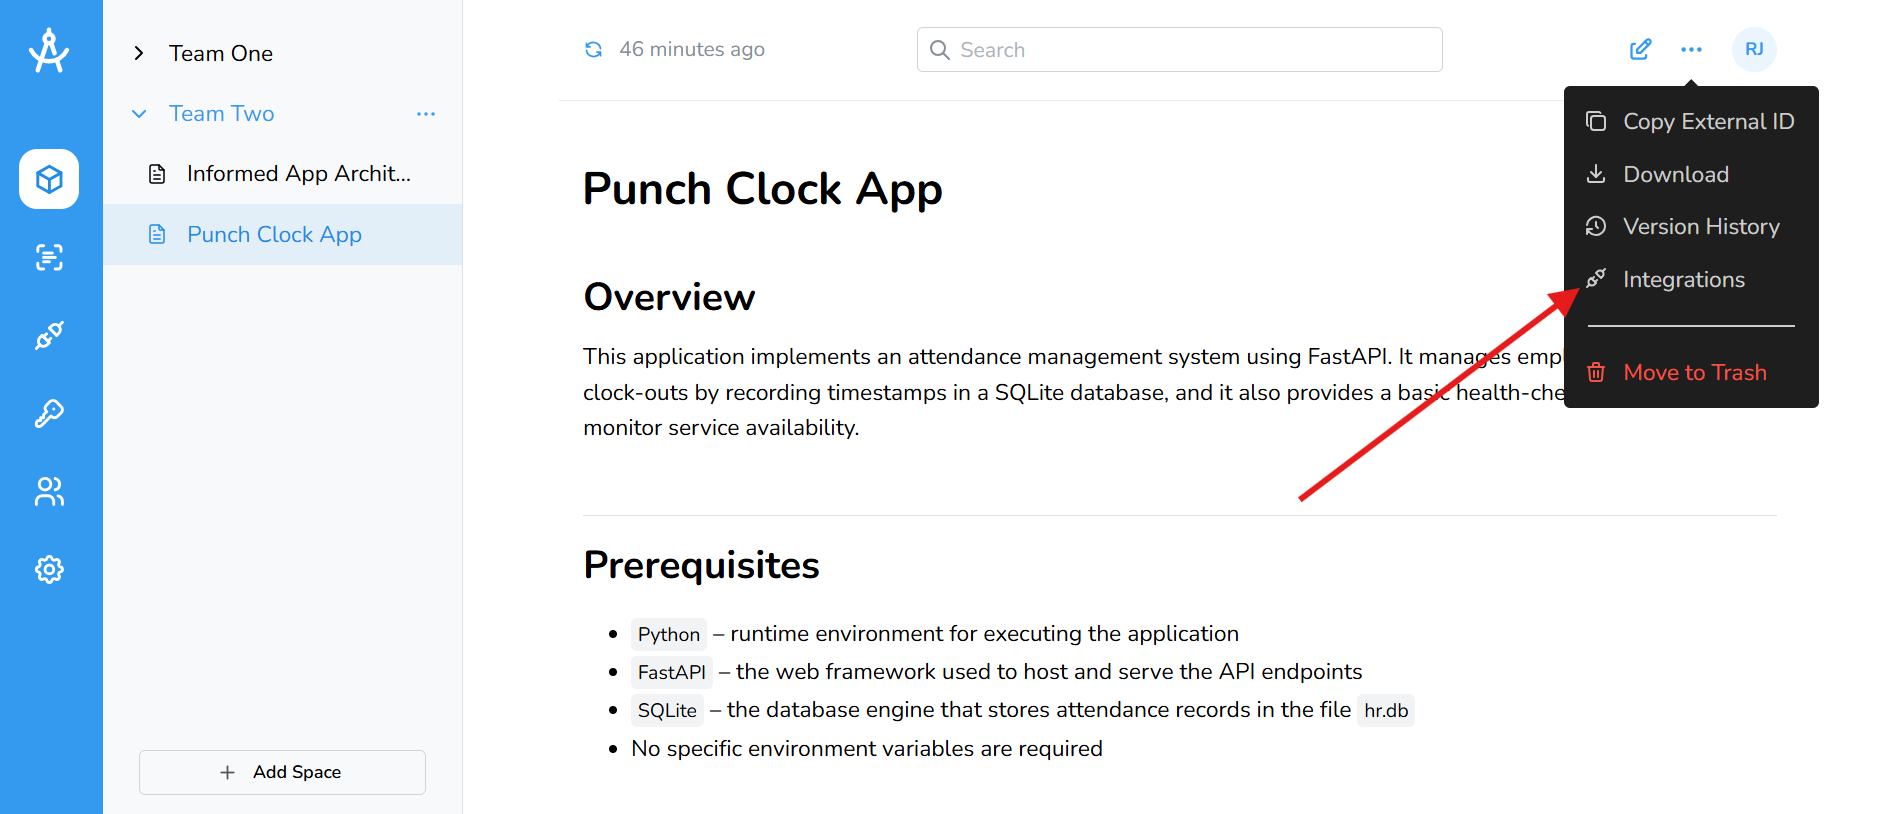
- Navigate to the document you want to sync. In the top-right toolbar, click the ellipsis (⋯) and select Integrations.
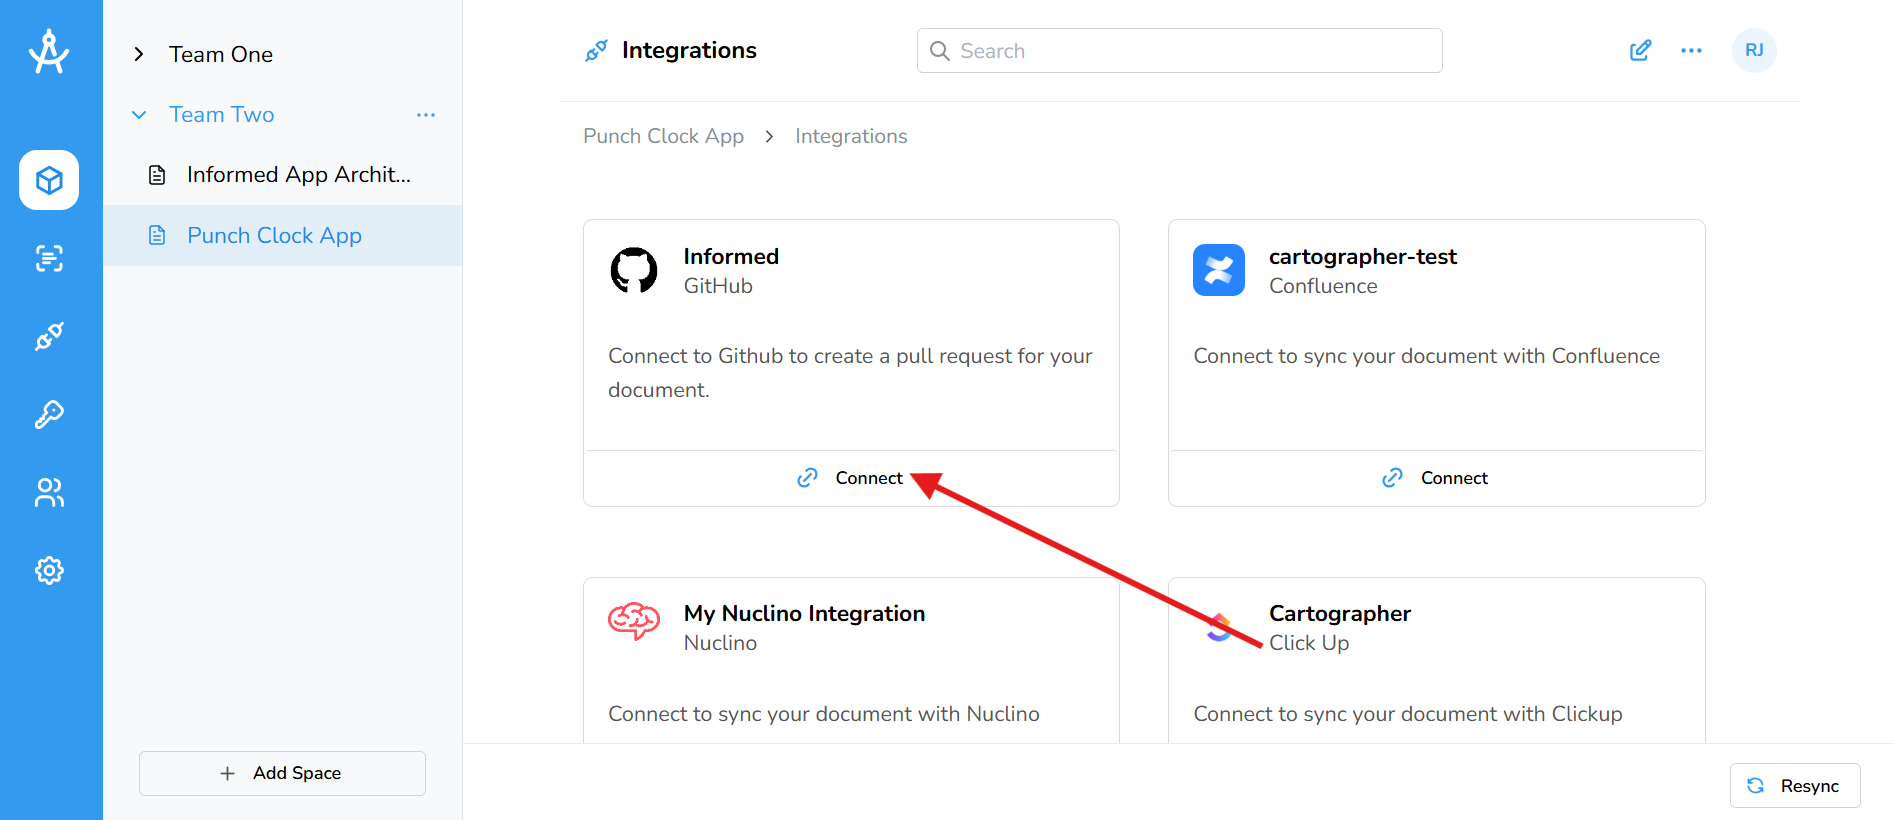
- Your GitHub integration will appear in the grid view. Click the Connect button to link your document to your GitHub instance.
-
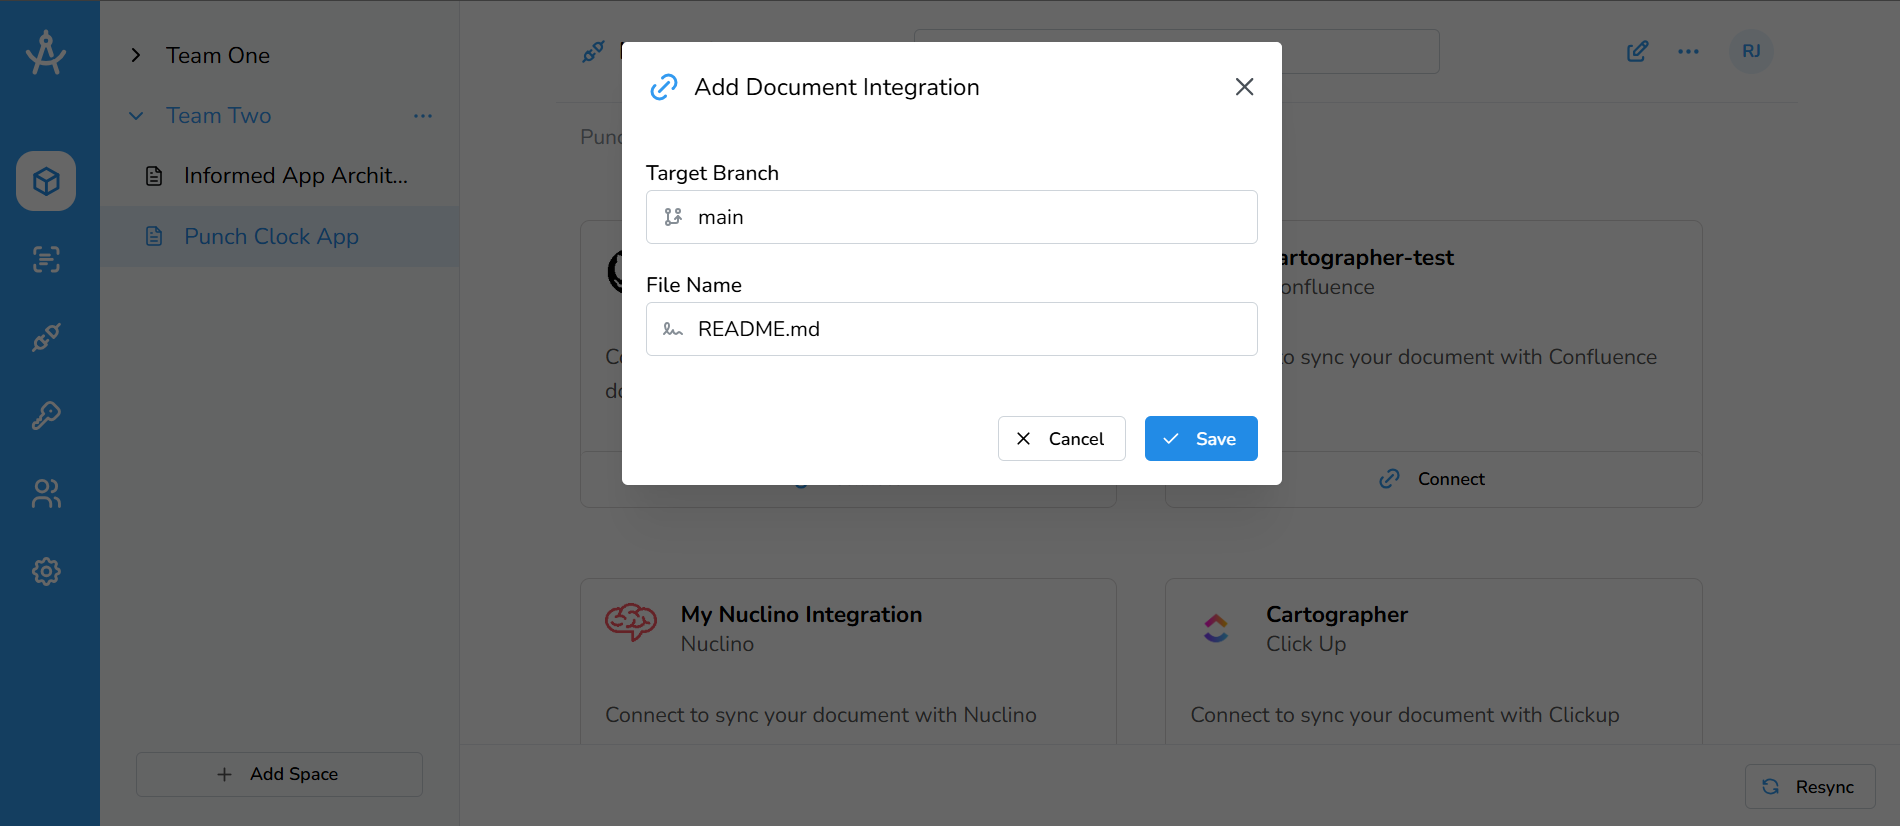
A modal will appear prompting for two fields:
Target Branch and File Name
-
Target Branch: The branch where your PR will be
created. Defaults to
main. - File Name: The name your page will have in your GitHub repository. Defaults to README.md
-
Target Branch: The branch where your PR will be
created. Defaults to
- Once all required fields are filled out, click Save to connect.
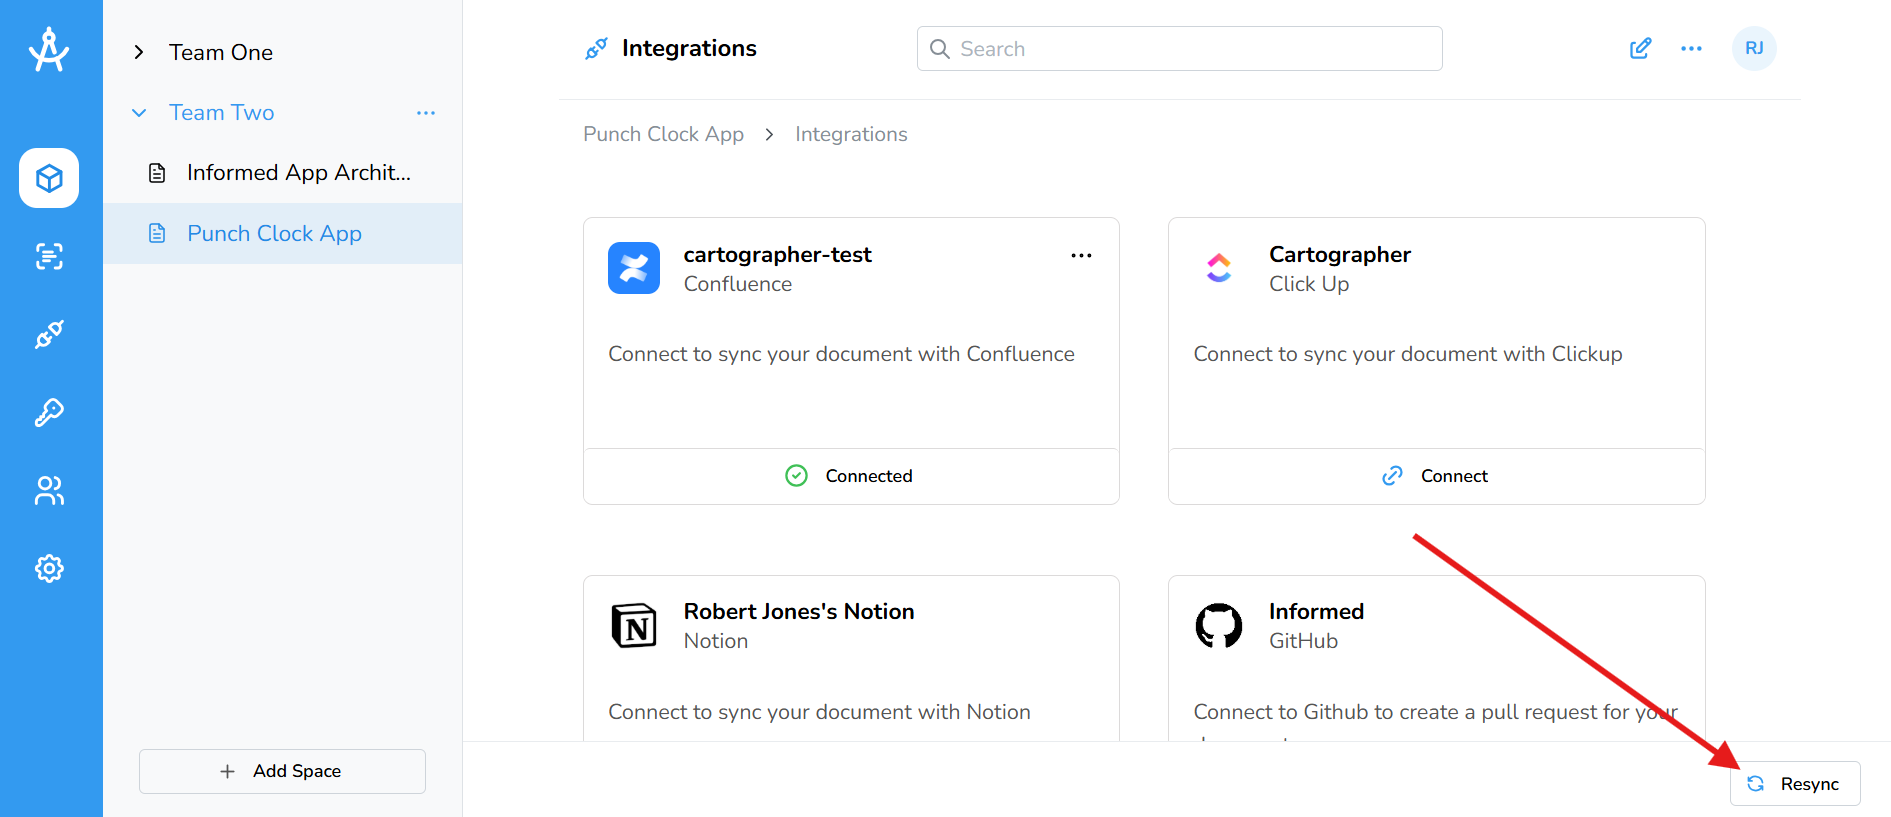
- Once your document is connected, you must click the Resync button in the bottom-right corner to create or update GitHub pages. This ensures that any edits, additions, or formatting changes in your Cartographer document are reflected in GitHub. Click Resync whenever you make changes to keep your GitHub repository up to date. Resyncing will create a new pull request if one is not alreay there.
- To edit or delete a document integration, click the ellipsis (⋯) icon to access the available options.
- That’s it! Your document is now viewable in your GitHub repository.